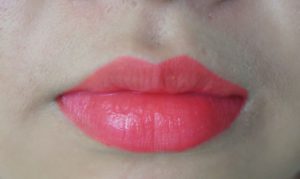
[vc_row][vc_column][vc_column_text]Open the image containing lips.[/vc_column_text][/vc_column][/vc_row][vc_row][vc_column][vc_single_image image=”11023″ img_size=”full”][/vc_column][/vc_row][vc_row][vc_column][vc_column_text]Go to the brush tool, make sure the foreground color is black, Mode is Normal, & Opacity is 100%.[/vc_column_text][/vc_column][/vc_row][vc_row][vc_column][vc_single_image image=”11024″ img_size=”full”][/vc_column][/vc_row][vc_row][vc_column][vc_column_text]Click on the Quick Mask Tool to activate it. You can also achieve this b pressing “Q.”[/vc_column_text][/vc_column][/vc_row][vc_row][vc_column][vc_single_image image=”11025″ img_size=”full”][/vc_column][/vc_row][vc_row][vc_column][vc_column_text]Now brush over the lips until you fill them. Use “[“ or “]” to decrease/increase the brush size. Adjust the hardness of the brush. In this case I’ve kept at 40%.[/vc_column_text][/vc_column][/vc_row][vc_row][vc_column][vc_single_image image=”11026″ img_size=”full”][/vc_column][/vc_row][vc_row][vc_column][vc_column_text]Now press the letter “
Q” to make a selection of the quick mask then go to
Select > Inverse or
Ctrl + Shift + I.[/vc_column_text][/vc_column][/vc_row][vc_row][vc_column][vc_single_image image=”11027″ img_size=”full”][/vc_column][/vc_row][vc_row][vc_column][vc_column_text]Now go to
Select > Save Selection… and type in a name of your choice for the selection in the textbox for Name: in my case, I named it
LipColor.[/vc_column_text][/vc_column][/vc_row][vc_row][vc_column][vc_single_image image=”11028″ img_size=”full”][/vc_column][/vc_row][vc_row][vc_column][vc_column_text]Click on the New Fill or Adjustment Layer icon and choose Solid Color…[/vc_column_text][/vc_column][/vc_row][vc_row][vc_column][vc_single_image image=”11029″ img_size=”full”][/vc_column][/vc_row][vc_row][vc_column][vc_column_text]In the Layers panel, now just switch the blend modes to blend the color with the lips. I’ve used
Multiply in this case. Change the opacity as needed.[/vc_column_text][/vc_column][/vc_row][vc_row][vc_column width=”1/2″][vc_single_image image=”11030″ img_size=”full”][/vc_column][vc_column width=”1/2″][vc_single_image image=”11031″ img_size=”full”][/vc_column][/vc_row][vc_row][vc_column][vc_column_text]To change to other colors, click on the color in the Adjustment Layer, and when the color picker opens, choose another color.[/vc_column_text][/vc_column][/vc_row][vc_row][vc_column][vc_single_image image=”11032″ img_size=”full”][/vc_column][/vc_row][vc_row][vc_column][vc_single_image image=”11033″ img_size=”full”][/vc_column][/vc_row][vc_row][vc_column][vc_column_text]This looks unnatural, but we can adjust that with other adjustment layers. Press Ctrl + Click on the layer mask, this will call up its selection.[/vc_column_text][/vc_column][/vc_row][vc_row][vc_column width=”1/2″][vc_single_image image=”11034″ img_size=”full”][/vc_column][vc_column width=”1/2″][vc_single_image image=”11035″ img_size=”full”][/vc_column][/vc_row][vc_row][vc_column][vc_column_text]Click on the adjustment layer icon and choose Brightness/Contrast…[/vc_column_text][/vc_column][/vc_row][vc_row][vc_column width=”1/2″][vc_single_image image=”11036″ img_size=”full”][/vc_column][vc_column width=”1/2″][vc_single_image image=”11037″ img_size=”full”][/vc_column][/vc_row][vc_row][vc_column][vc_column_text]Adjust the brightness/contrast settings till you achieve desired effect.[/vc_column_text][/vc_column][/vc_row][vc_row][vc_column][vc_single_image image=”11038″ img_size=”full”][/vc_column][/vc_row]
