

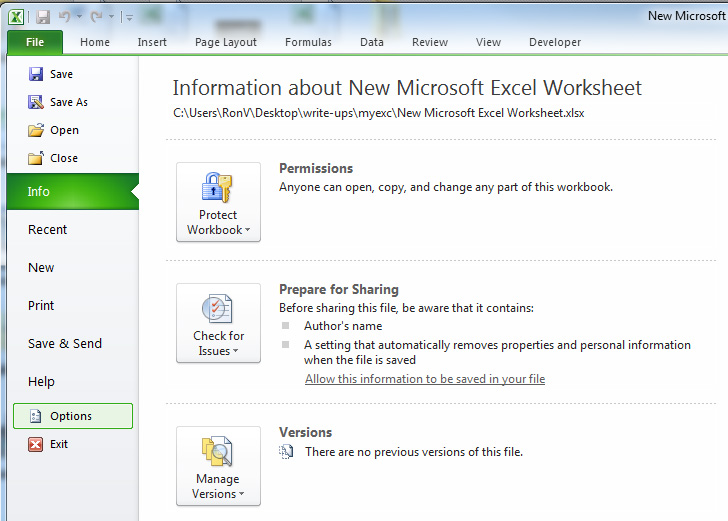
Learn how to autocorrect in Excel. You can set up how you want Excel to read what you type and adjust it according to your preferences. This is a good tool to save you time if you make repetitive mistakes, such as the wrong capitalization, or write shorthand that you want Excel to write out for you. To do this, start by opening an Excel document and going to “File”, then down to “Options”.
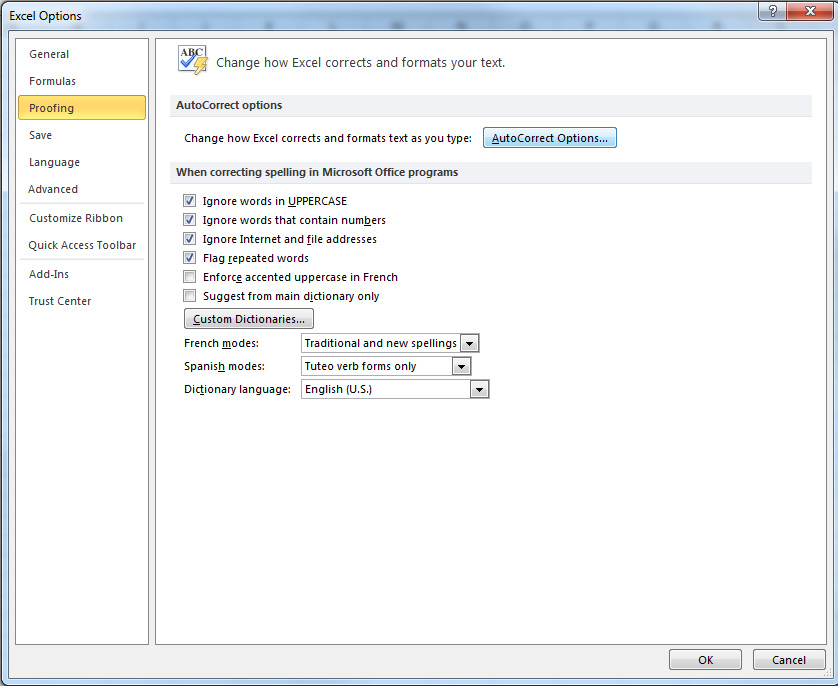
Next, choose “Proofing” and from there, go to the right and click “AutoCorrect Options”
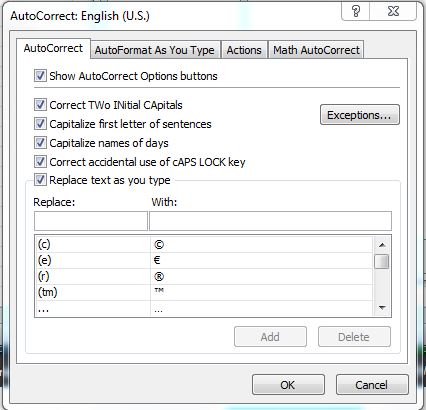
Now you can open up the autocorrect dialog box.
Excel already has some boxes set up for the more common autocorrect needs, such as capitalization issues. You can check or un-check these boxes, and use the “Exception” button on the right to make the autocorrects only take place when you want them to.
Below is where you can use the “Replace” and “With” boxes. You can add items that you use shorthand when typing, for instance if you type “ur” but want Excel to spell out “your”. You can also change or delete the items Excel already has entered here.
After this, you can further customize your Excel autocorrect with the top tabs. When you are done, click on “Save” and this will be applied to all of your future Excel documents you open, create, and edit. You can go back and change these settings at any time.
Check this out while you wait!