

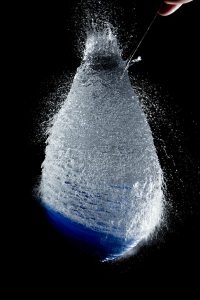
Taking high-speed photos seems to be the bread and butter of any photographer, amateur or otherwise. Whether it’s a hummingbird flapping their wings or a bullet whizzing through water, there is an appeal to this type of photo.
The question then becomes, “How do I do that?
This simple guide was created to help you master the art of taking high-speed photos with your own camera.
The Things You’ll Need for High-Speed Photos
You pretty much just need a good solid camera and a copy of Photoshop at your side. Monthly plans for Adobe start at around 10 bucks so you can give that a try if you don’t want to pay full price for an older version.
Requirements:
• Digital camera with manual exposure control and RAW shooting
• External flash with manual setting (wireless trigger system not needed)
• A tripod
• Photoshop and Adobe Camera RAW
Camera Settings:
Start by setting the aperture around f/5.6. You can adjust this value depending on your location.
You can then set the shutter speed around 1/250 or faster. Remember faster the shutter speed, darker the photo, so using a flash would be advisable.
Use a sound activated camera trigger to get best results with less number of tries. You can always try to coordinate activating the shutter and like popping a balloon at the same time but may take a lot of tries before achieving the perfect shot. You can also try using a manual shutter release or turn on the Continuous shooting mode on. You may have to take a few tries but you’ll eventually get the shot you want.
And that’s pretty much it. You should have everything you need to create beautiful high-speed images that will impress friends, family, and instructors.
You have the power to capture life’s most precious and fleeting moments. Go out and capture some of the world’s magic.
Check this out while you wait!