

It’s fast, simple, and within minutes you can by applying these steps for your own needs. So what are you waiting for, get started right now!
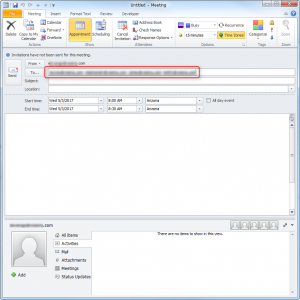
Select Calendar from the left pane. Then go to Home tab and click on New Meeting.[/vc_column_text][/vc_column][/vc_row][vc_row][vc_column][vc_single_image image=”11262″ img_size=”medium”][/vc_column][/vc_row][vc_row][vc_column][vc_column_text]An Untitled meeting box will be opened. In this Dialog Box, set the Date, Time, & Description.[/vc_column_text][/vc_column][/vc_row][vc_row][vc_column][vc_single_image image=”11263″ img_size=”medium”][/vc_column][/vc_row][vc_row][vc_column][vc_column_text]If you want to schedule meetings based on a different Time Zone, go to Meeting, then click on Time Zones under the Options group.[/vc_column_text][/vc_column][/vc_row][vc_row][vc_column][vc_single_image image=”11264″ img_size=”medium”][/vc_column][/vc_row][vc_row][vc_column][vc_column_text]In the Location Box, type the meeting’s location.[/vc_column_text][/vc_column][/vc_row][vc_row][vc_column][vc_single_image image=”11265″ img_size=”medium”][/vc_column][/vc_row][vc_row][vc_column][vc_column_text]Click on the Meeting tab, in the Show group, click Scheduling. Then click Add Others.[/vc_column_text][/vc_column][/vc_row][vc_row][vc_column][vc_single_image image=”11266″ img_size=”medium”][/vc_column][/vc_row][vc_row][vc_column][vc_column_text]You will then click the name from the “results list,” then choose Required, Optional, or Resources and then click the OK button.[/vc_column_text][/vc_column][/vc_row][vc_row][vc_column][vc_single_image image=”11267″ img_size=”medium”][/vc_column][/vc_row][vc_row][vc_column][vc_column_text]Once you send this schedule to the recipients or attendees, then they will get two options (accept and decline). However, they accept the meetings request then it will automatically add into the calendar circular, if they decline, then you will get notification from the recipient response.
Click on the Appointment button from the ribbon area and go back and edit the invitation email quickly.
After some time you will see that meeting has been added to your calendar, once the email invitation accepted by the clients.[/vc_column_text][/vc_column][/vc_row][vc_row][vc_column][vc_single_image image=”11268″ img_size=”medium”][/vc_column][/vc_row][vc_row][vc_column][vc_column_text]Now you should have everything that you need to ORGANIZE MEETING SCHEDULE IN OUTLOOK 2010 AND ABOVE. Create your schedule just you want it to be and always be on top of your work tasks![/vc_column_text][/vc_column][/vc_row]
Check this out while you wait!